Campaign Settings
After all campaign items are set it is the right time to create a campaign in tracker.
- Go to Campaigns on the panel and press New button.

- In Campaign details section it is required to specify Campaign name and select Traffic source from the list of pre-configured.
- Specify Country that your campaign is targeted. If your campaign has multiple GEO, leave it to Global.
Note
Country setup doesn't affect on traffic distribution.
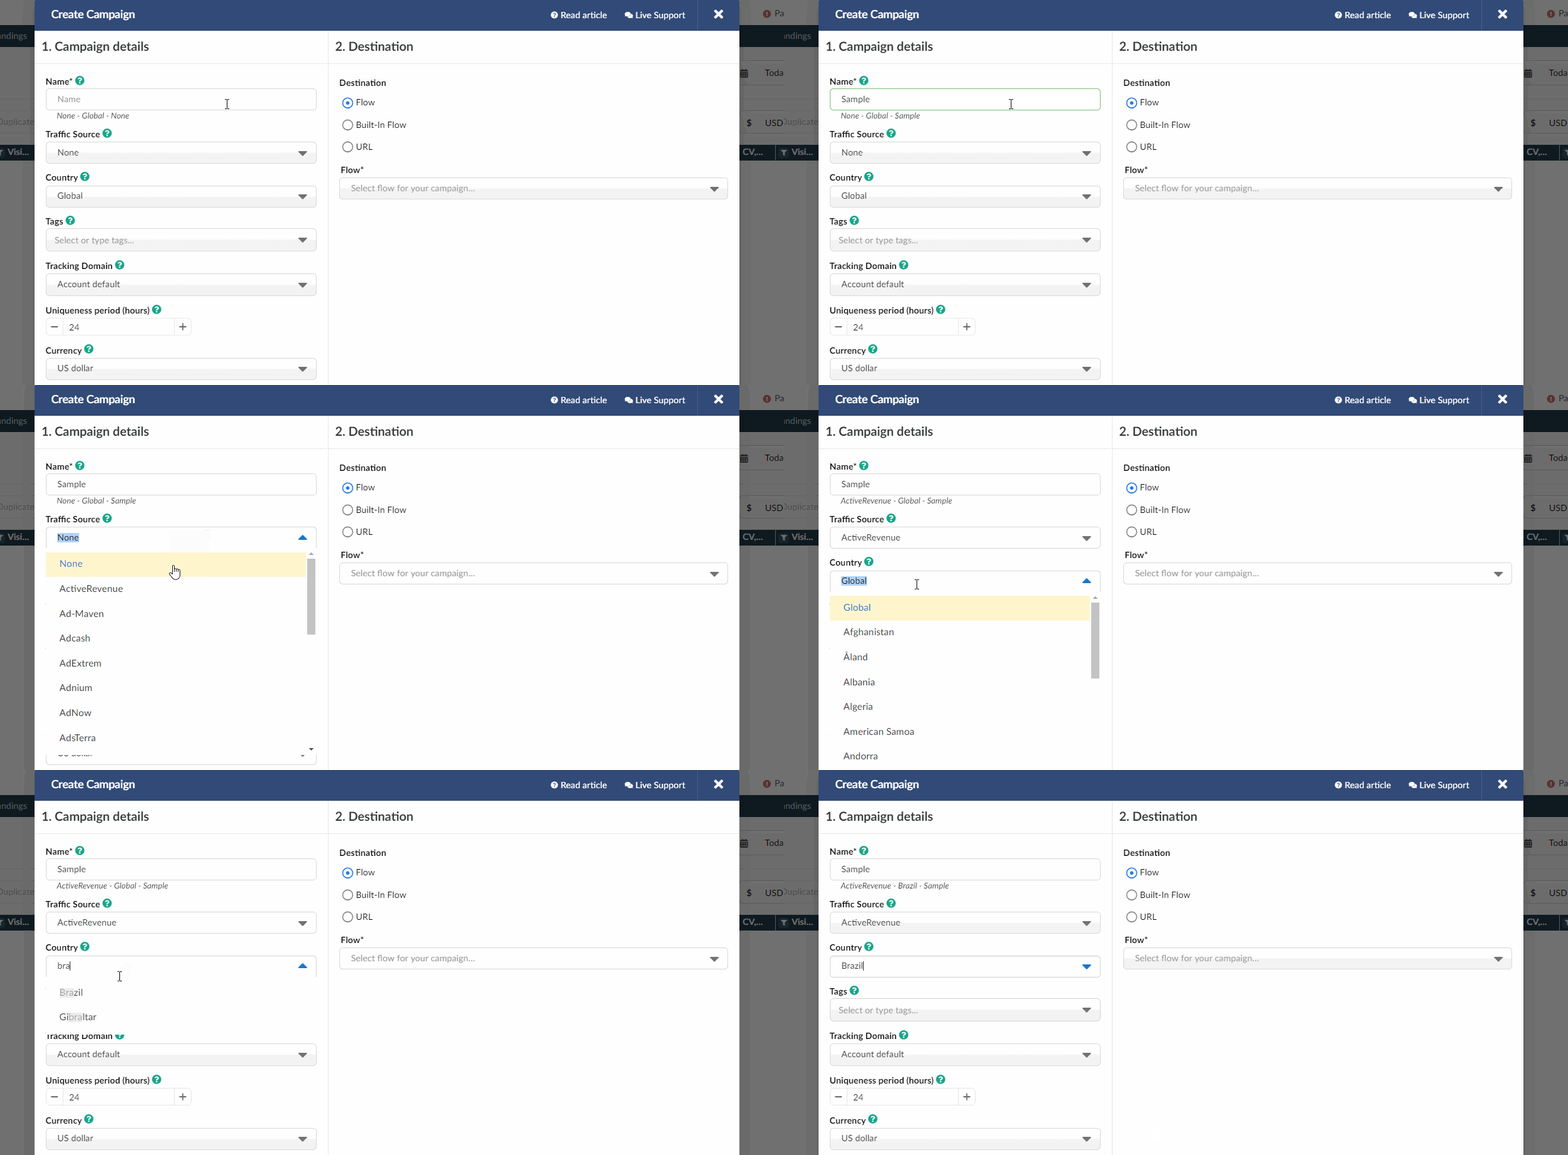
- Select Tracking domain from the list. All your Campaign links will contain this domain.
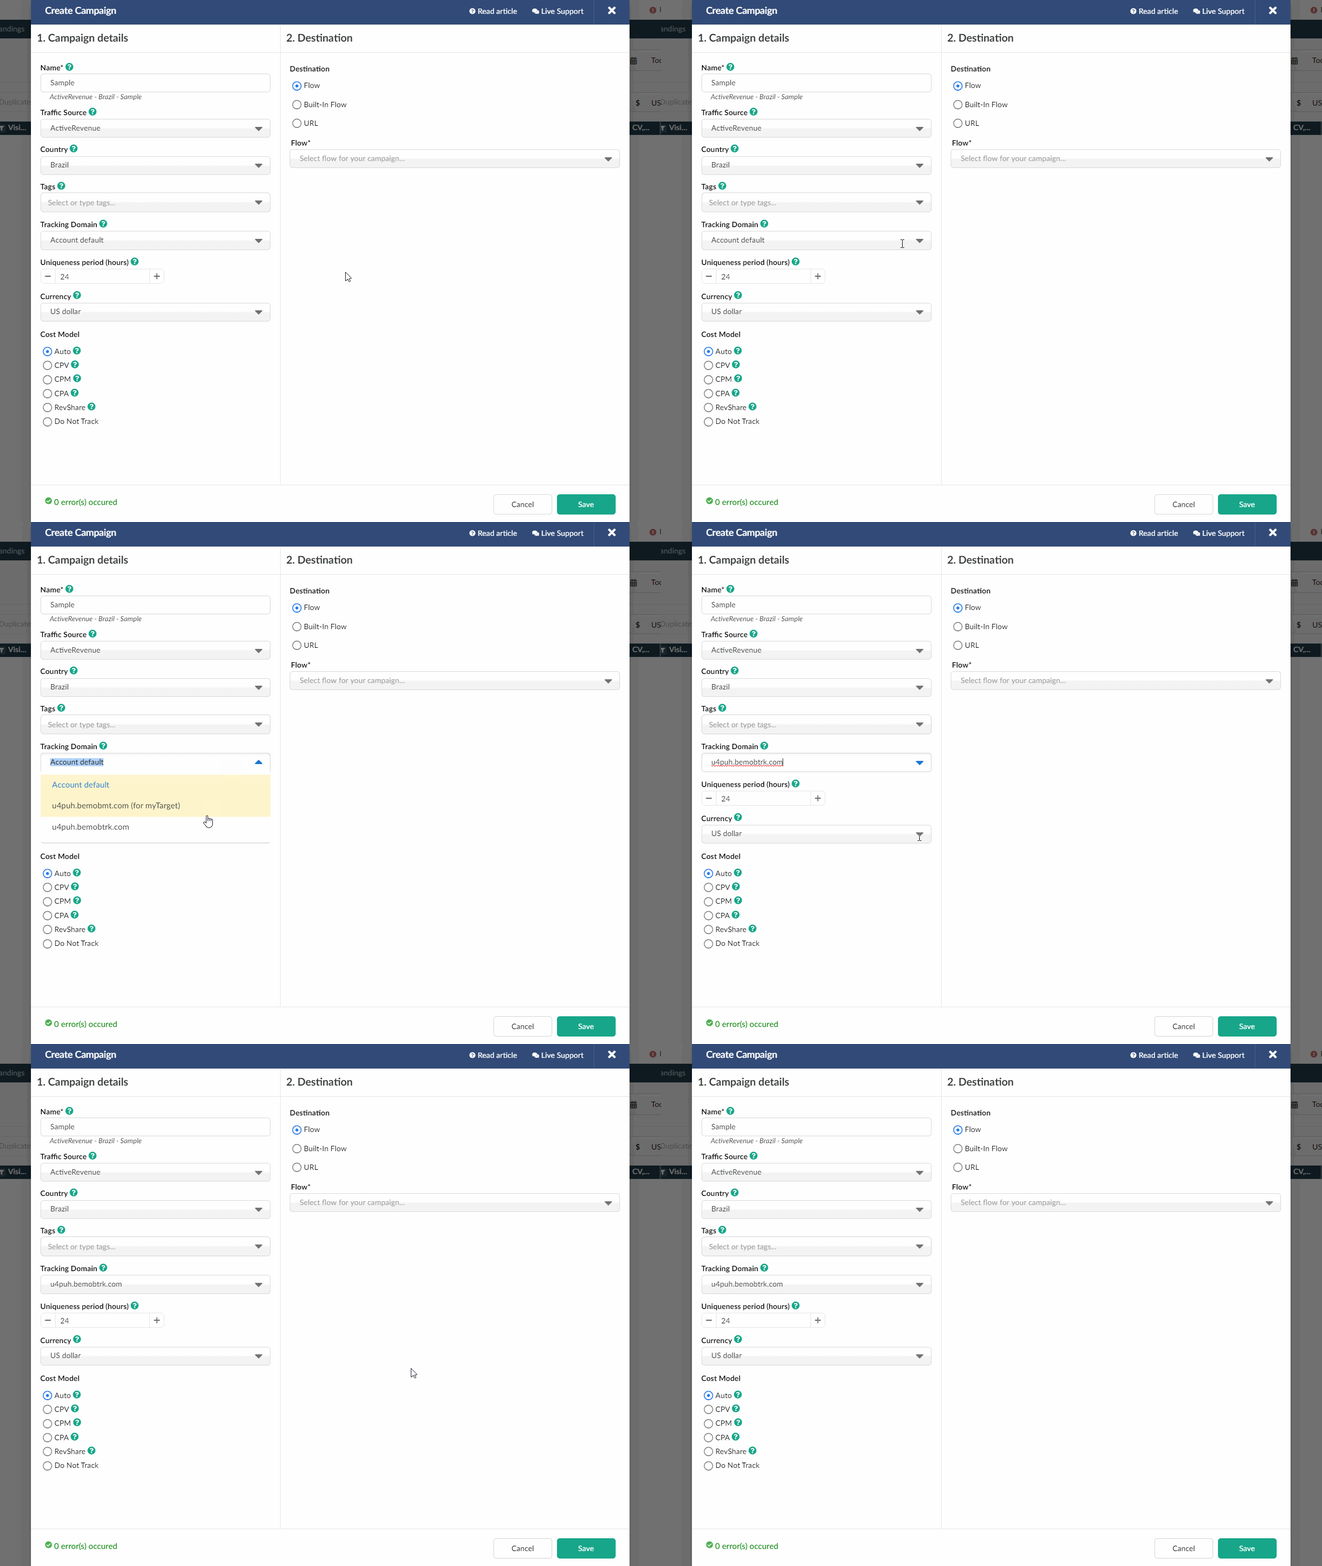
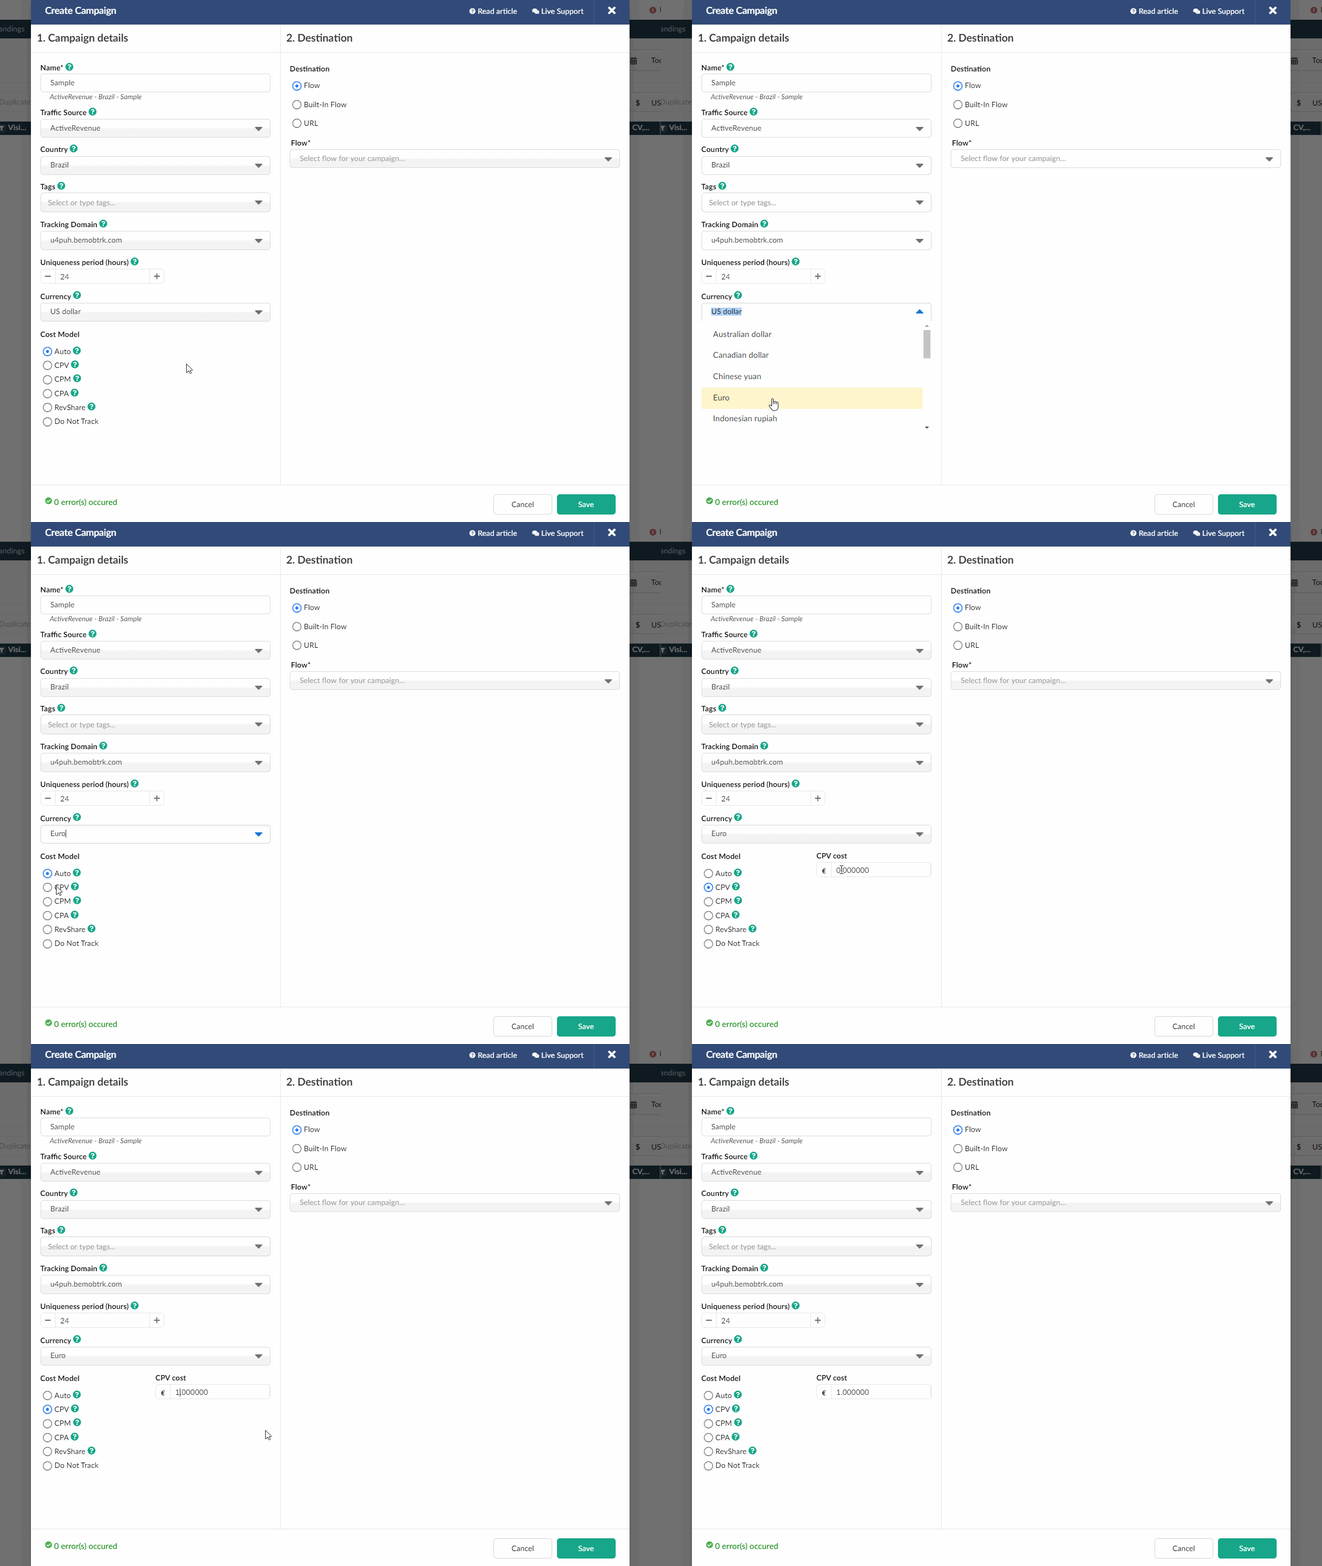
- Choose the required Currency for traffic cost. Campaign currency will be automatically converted to account currency in reports.
- Select corresponding Cost model and specify cost value.
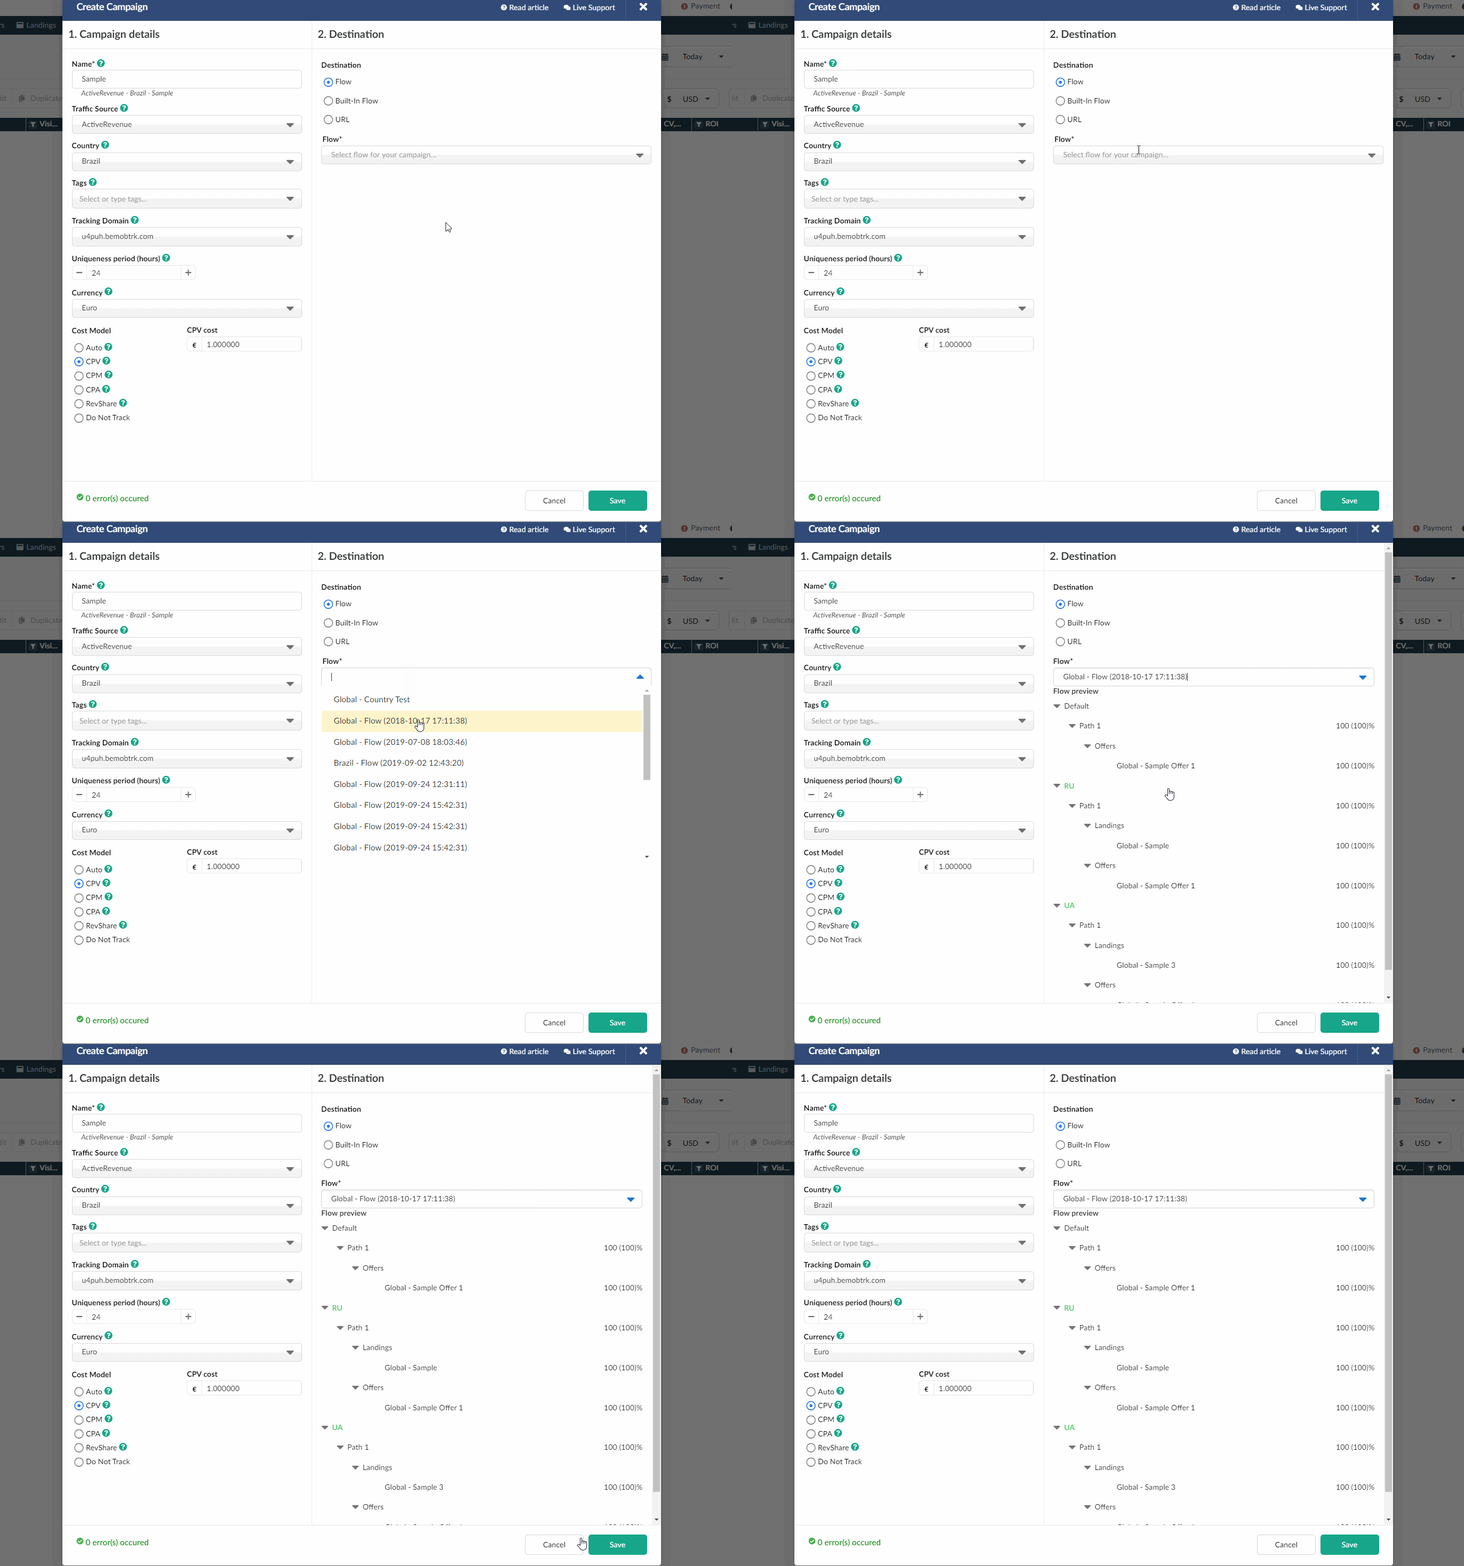
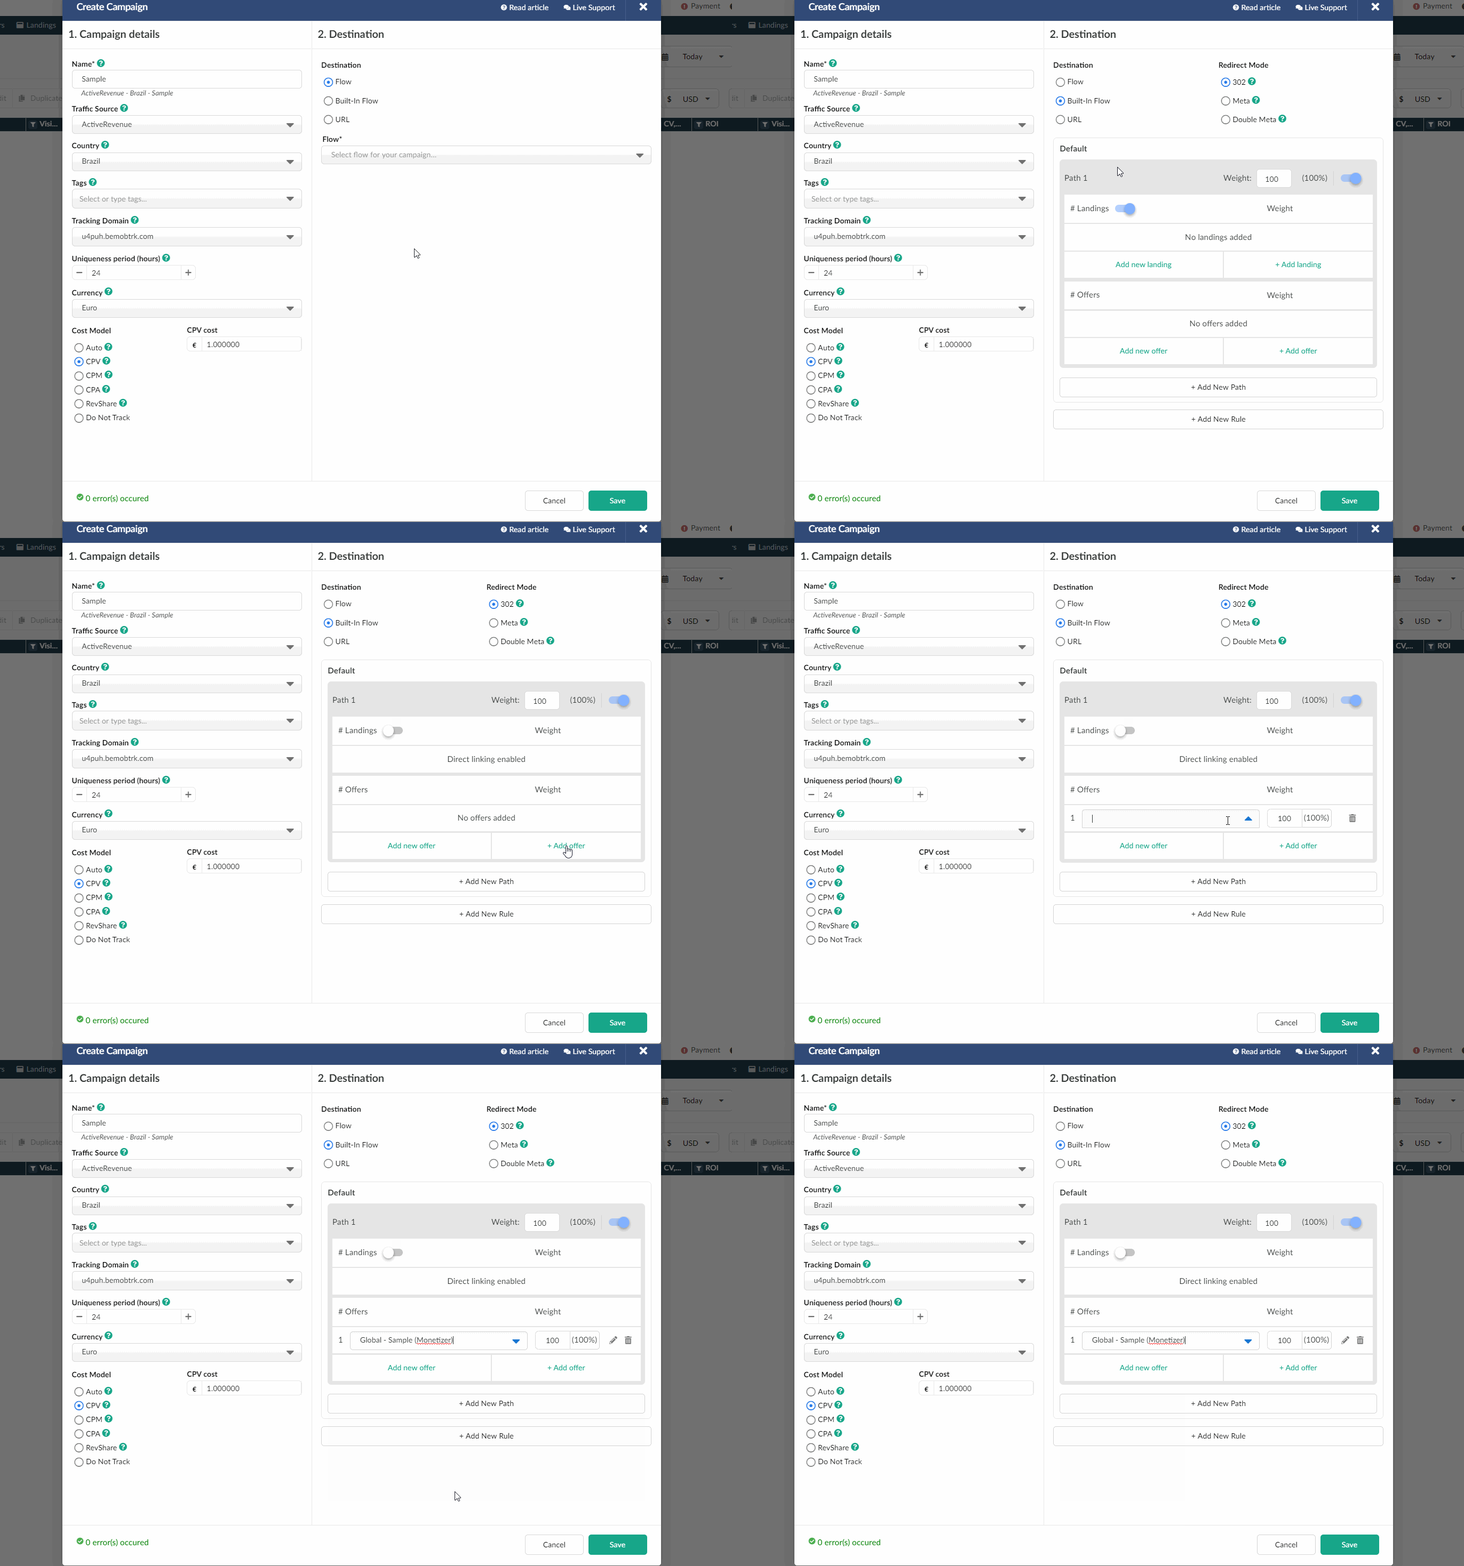
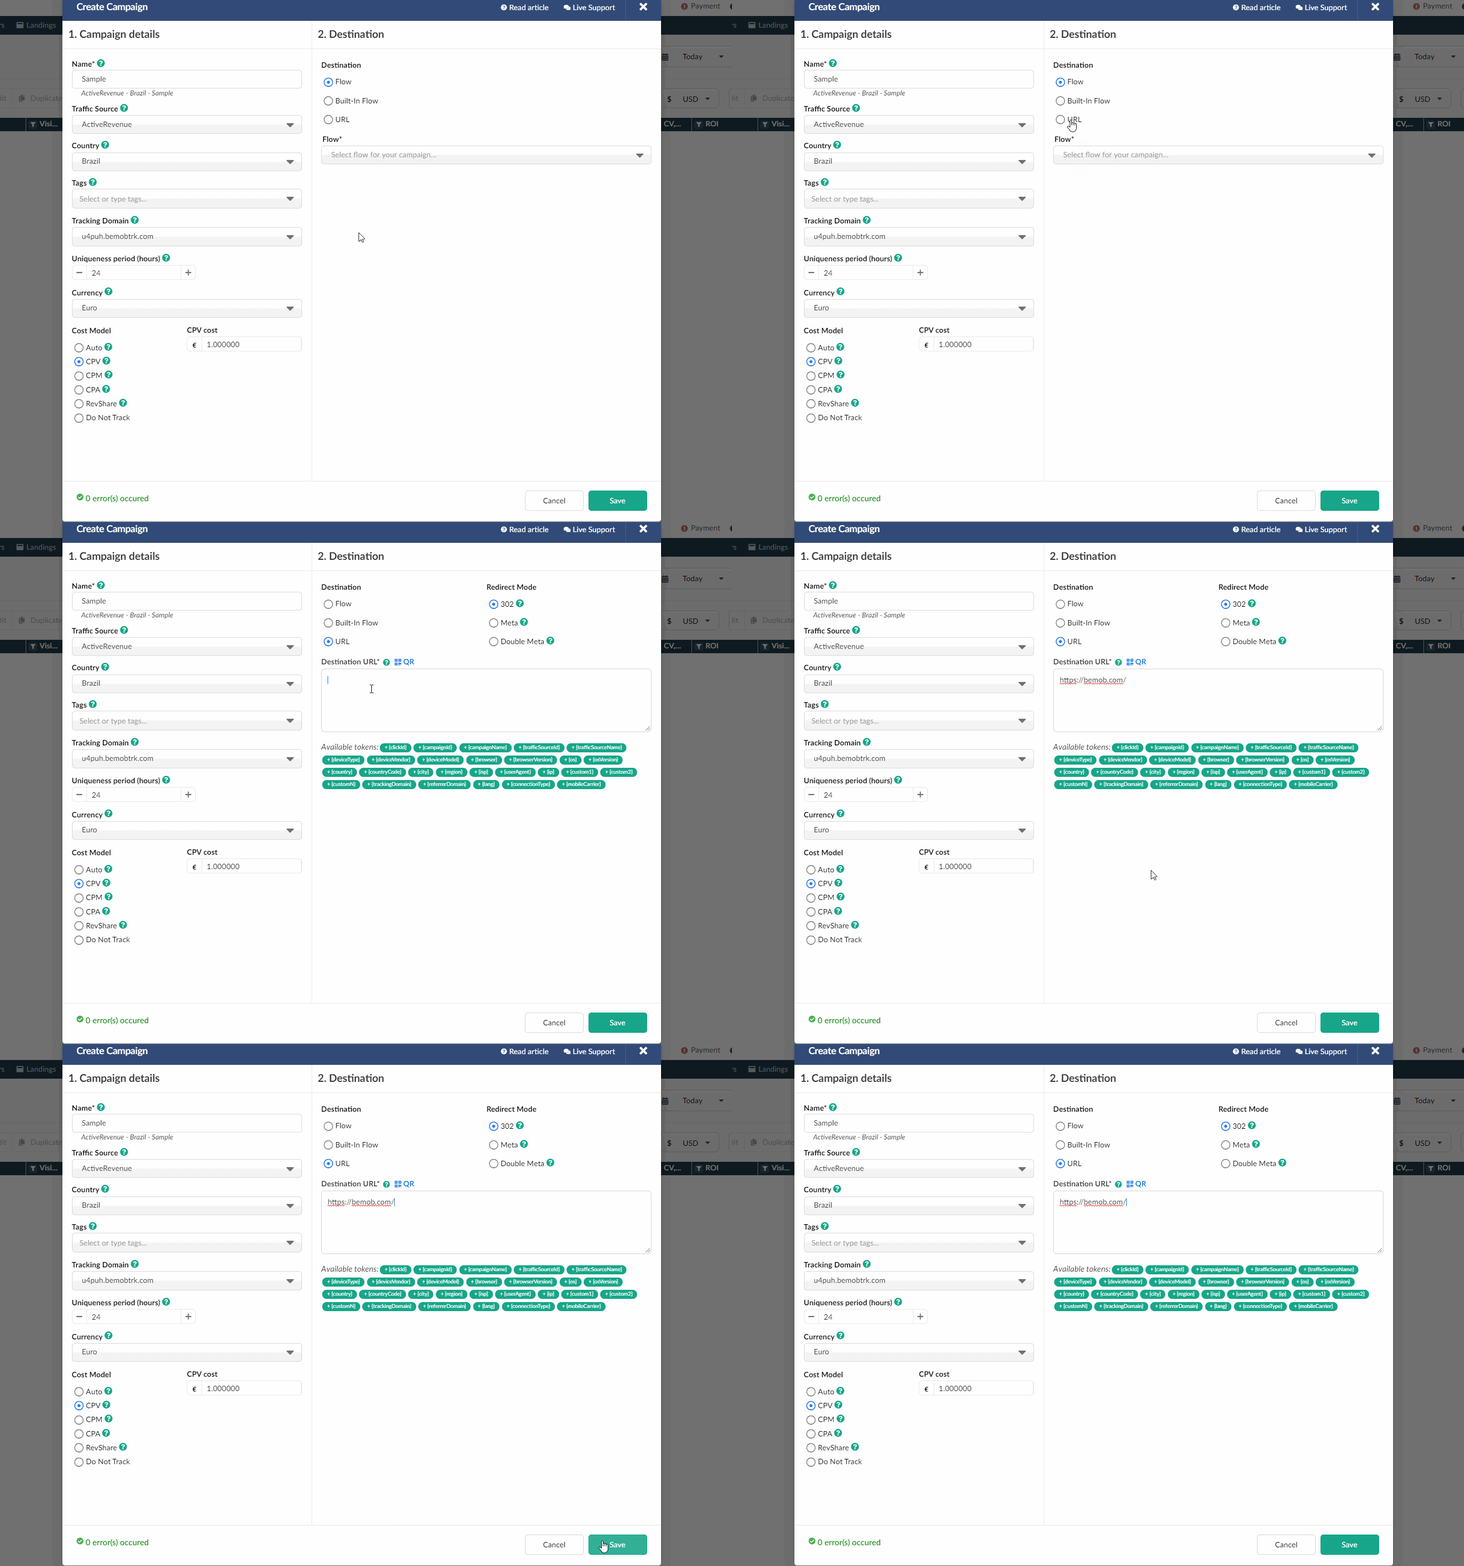
- In Destination section it is required to select one of three options.
- Flow can be selected if you have a preconfigured list of offers and landing pages configured in the rule-based paths.
More about flows see here.
- Built-in Flow should be selected if the endpoint of traffic is an offer link with landing page.
If the traffic is forwarded straight to the offer, it is required to switch off the landing page in Built-in Flow settings.
- Select URL if the traffic is forwarded to a single destination URL with no offer and landing page created beforehand.
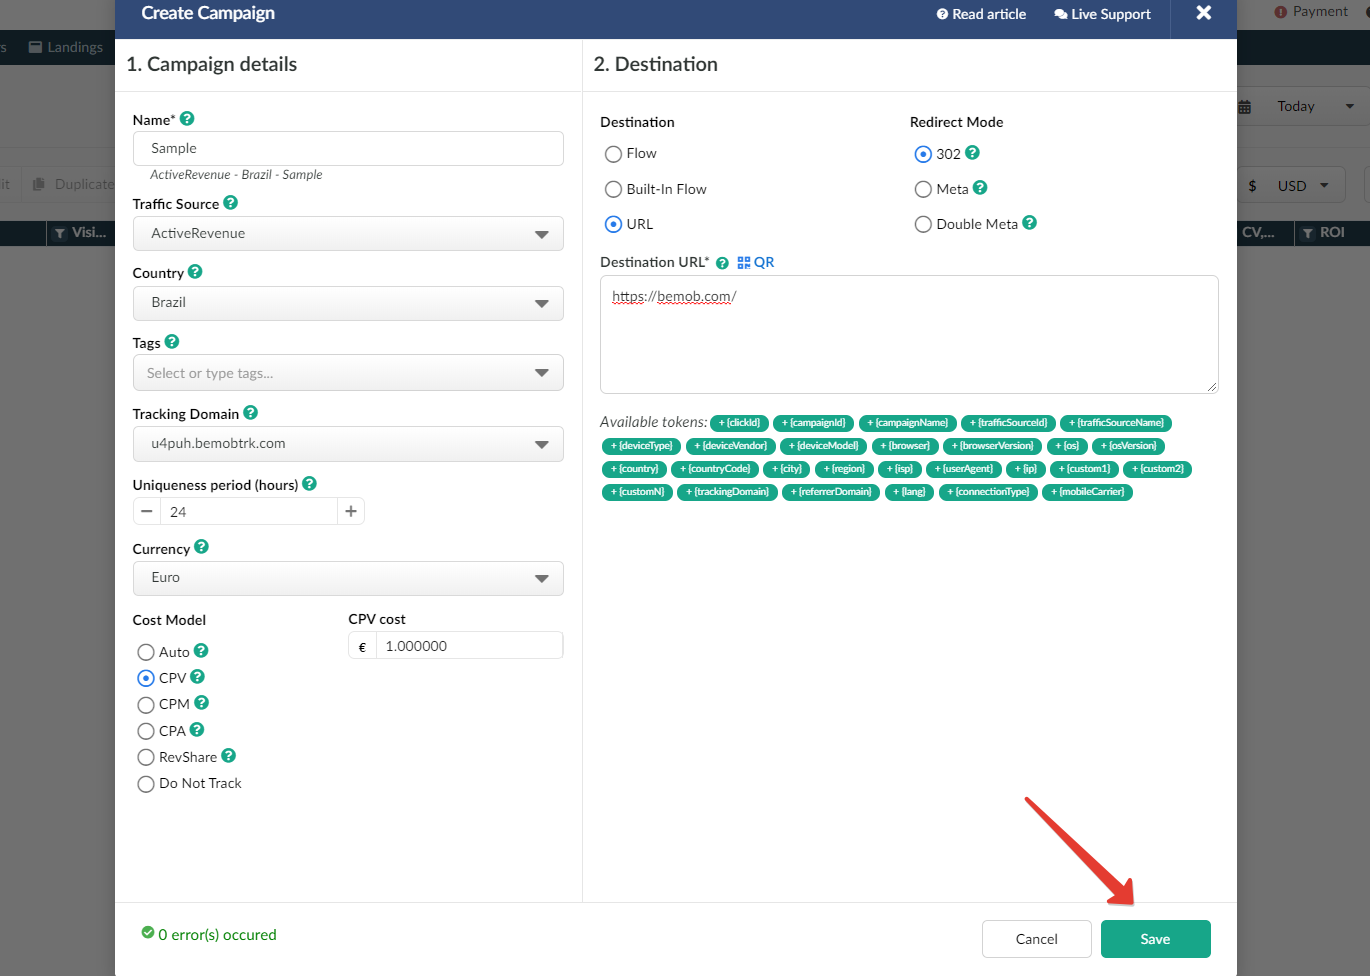
- Press Save to store the campaign settings.
- The window with the campaign links will appear.
The link you should place on the side of your traffic source is Campaign URL.

- After your campaign is approved on the side of your traffic source, you can start driving traffic to your campaign and track all the data with BeMob.
Updated over 5 years ago
