Bing Ads Campaign Settings
It becomes easier to start a campaign with Bing Ads as this traffic source is already listed in our templates.
Note
Before you start a campaign it is required to have:
1. Traffic Source Settings
To add Bing from templates:
- Press Traffic Sources.
- Click New from Template and select Bing from the list.
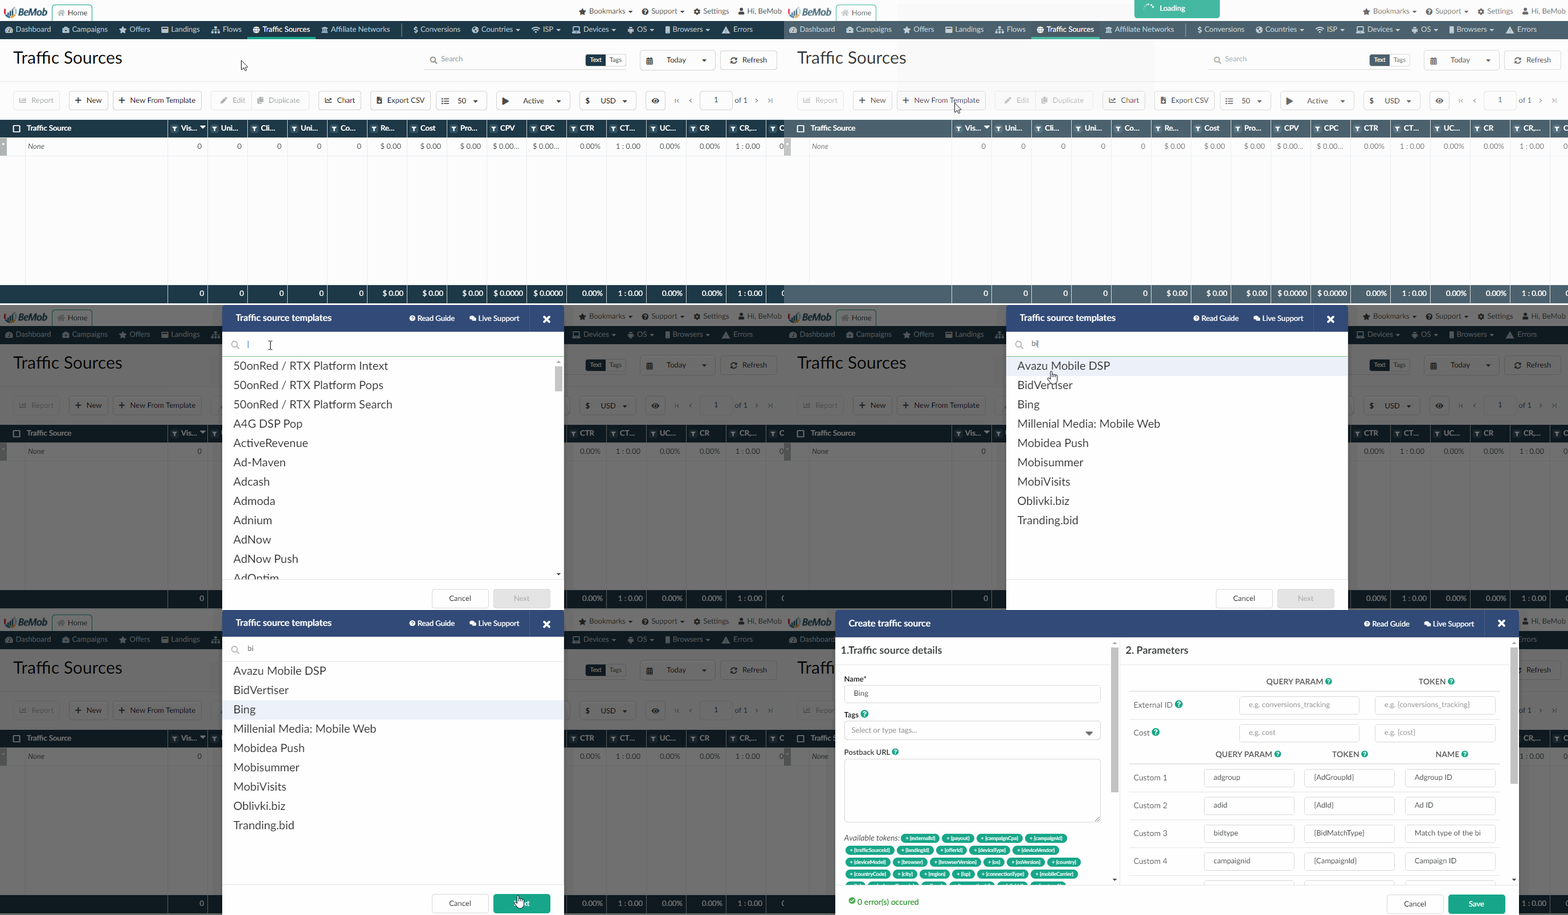
The traffic source template consists of two sections: Traffic Source Details with postback settings and Parameters.
Note
As Bing doesn't support Postback URL it is required to skip this setup and leave Postback URL field blank.
The list of parameters and tokens supported with Bing are already preconfigured in the template.
These parameters and tokens are required to transfer the additional details on traffic to your report in tracker, e.g. adgroup IDs, campaign IDs, ad IDs etc.
Note
Since you will be using landing page pixel method, the traffic data which is regularly passed in Campaign URL, will be passed through Landing Page Pixel installed in the body of your landing page.
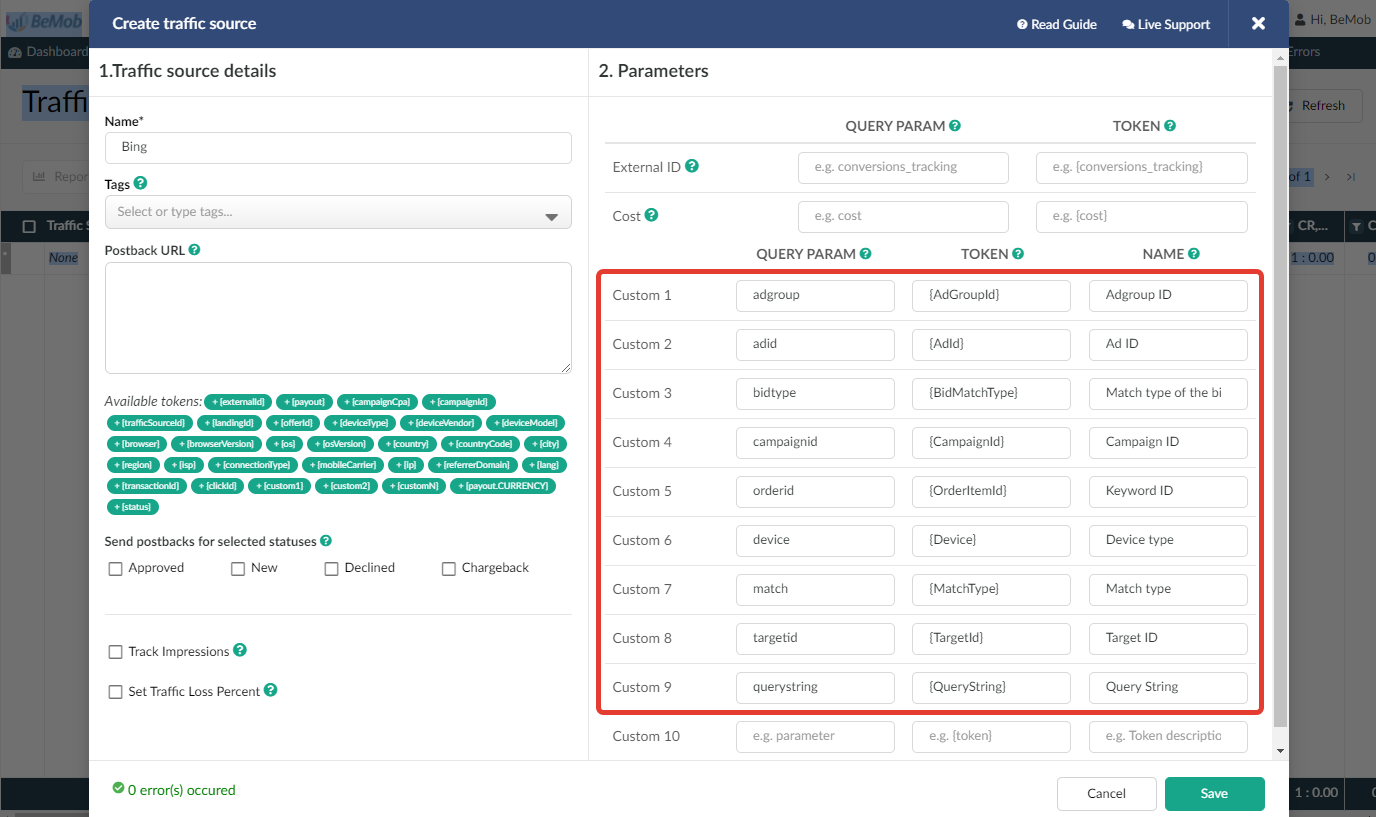
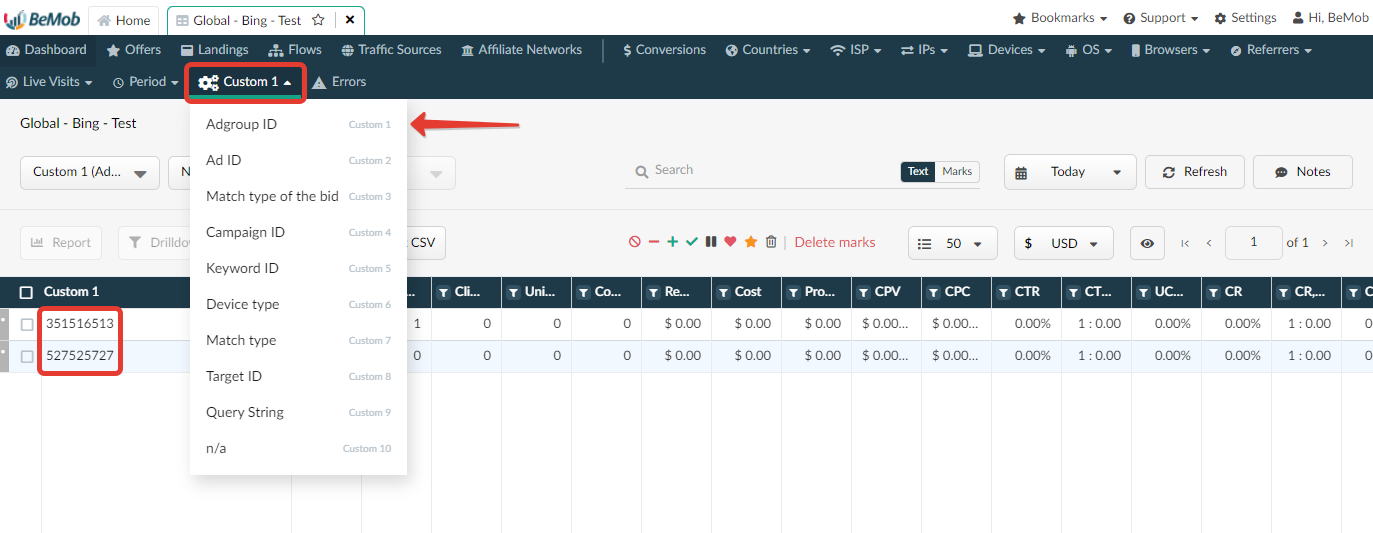
The data will be available in report on Custom parameters and can be used for further optimization and targeting of your campaigns.
To find the report on data passed from Bing, select your campaign, press Report, go to the Custom tab.
Press Save to store the traffic source settings for your future campaign.
2. Campaign Settings
After Bing is added from the templates, the campaign can be created in tracker.
- Press Campaigns tab.
- Click New.

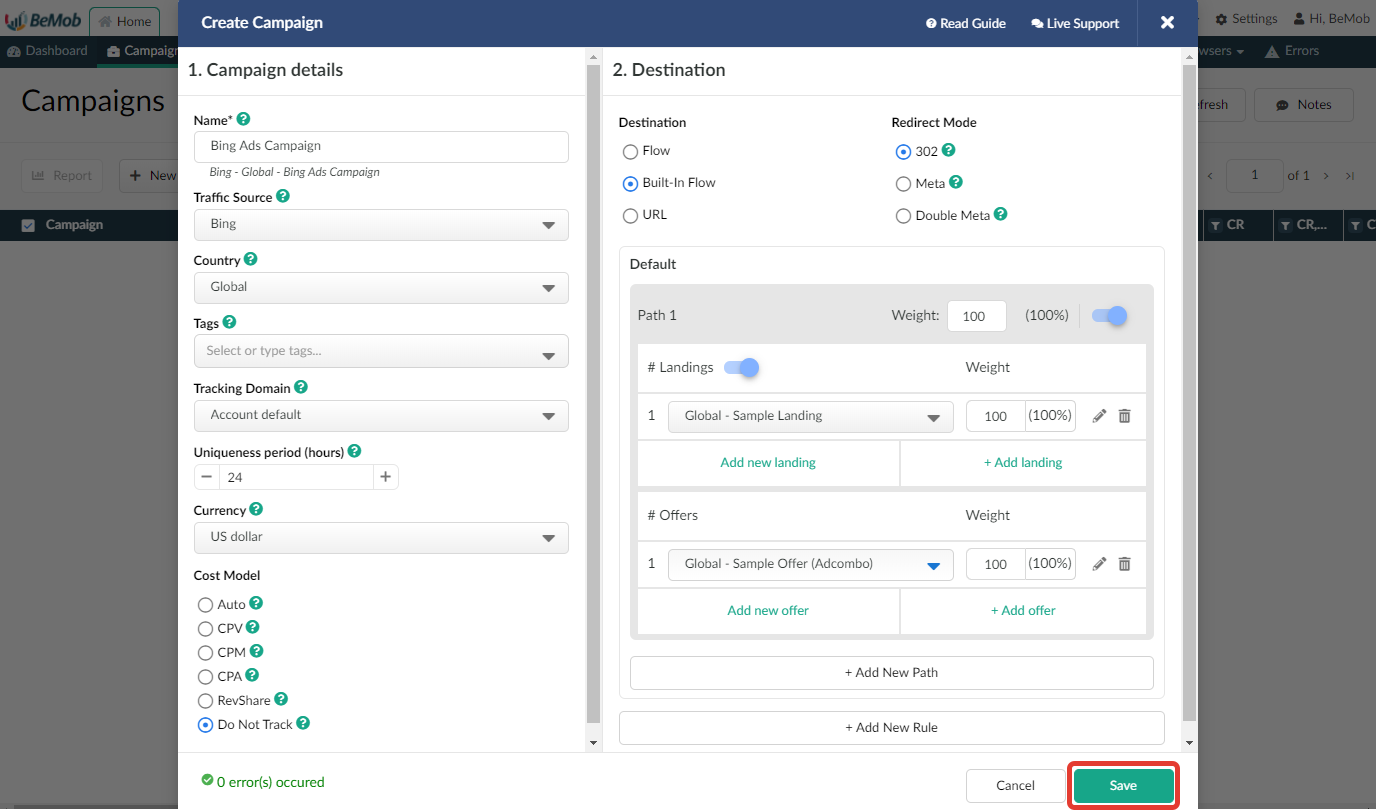
- Specify the name of campaign.
- Select Bing as Traffic Source.
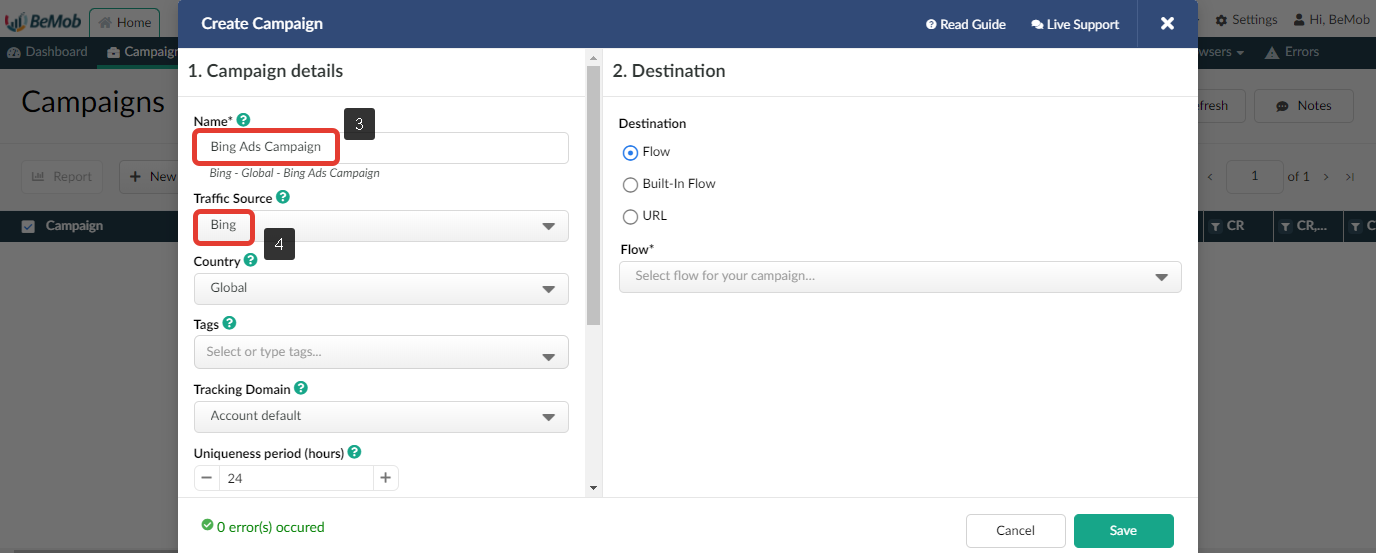
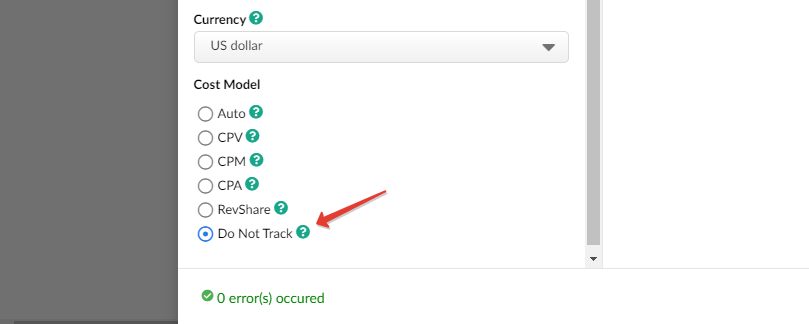
- Select one of the following cost models:
- CPV. With this cost model it is required to specify the value you pay per click on Bing ad. Clicks on your ad will be counted as visits in tracker.
- Do not track. Cost will not be tracked in this case. This cost model should be selected if the cost bid is not a fixed value. The cost can be update later through Update cost option.
Auto-tracking of cost data is not available since Bing is not supporting the dedicated cost token.
- In Destination section it is required to select either Flow or Built-in Flow.
The difference between these two options is that the Flow is a pre-configured element with different rule-based paths for advanced traffic distribution.
Built-in Flow is an easier version of flow which can be quickly set up in campaign settings.
URL as a Destination should not be selected for Bing campaign as it allows drive traffic straight to a single URL.
More about campaign destinations see in this guide.
Note
Make sure the landing page is configured in your Flow or Built-in Flow settings.
- Press Save to store the campaign settings.
3. Landing Page Pixel Settings
Bing has a strict policy concerning the third-party redirect. Using Campaign URL as tracking link will be problematic in this case.
Landing Page Pixel is an alternative tracking method that allows to avoid using the Campaign URL.
You are able to use Landing page URL instead of Campaign URL on the side of traffic source.
It means that Bing will not be able to detect the redirect since you are using the landing page as the endpoint of your campaign.
Meanwhile the script will be forwarding traffic through BeMob and all the traffic data will be tracked as it would go through the campaign URL.
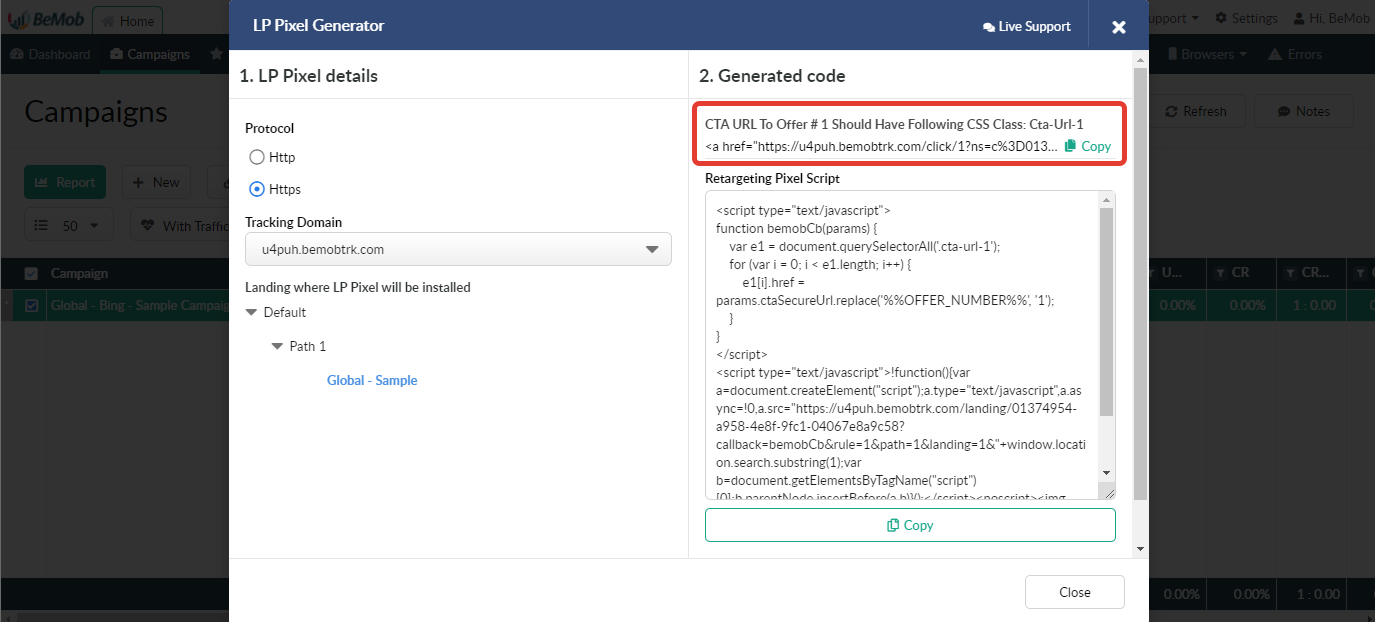
With such traffic source as Bing it is required to use custom tracking domain for both LP pixel and CTA URLs.
LP Pixel along with CTA URL can be found in LP Pixel Generator of Campaign links.
It is required to set LP Pixel inside the body of your landing page.
CTA URL should be placed on each CTA button of your landing page.
4. Campaign in Bing Ads
After Bing and Campaign with this traffic source are already set in BeMob, it is time to install campaign on the side of Bing Ads.
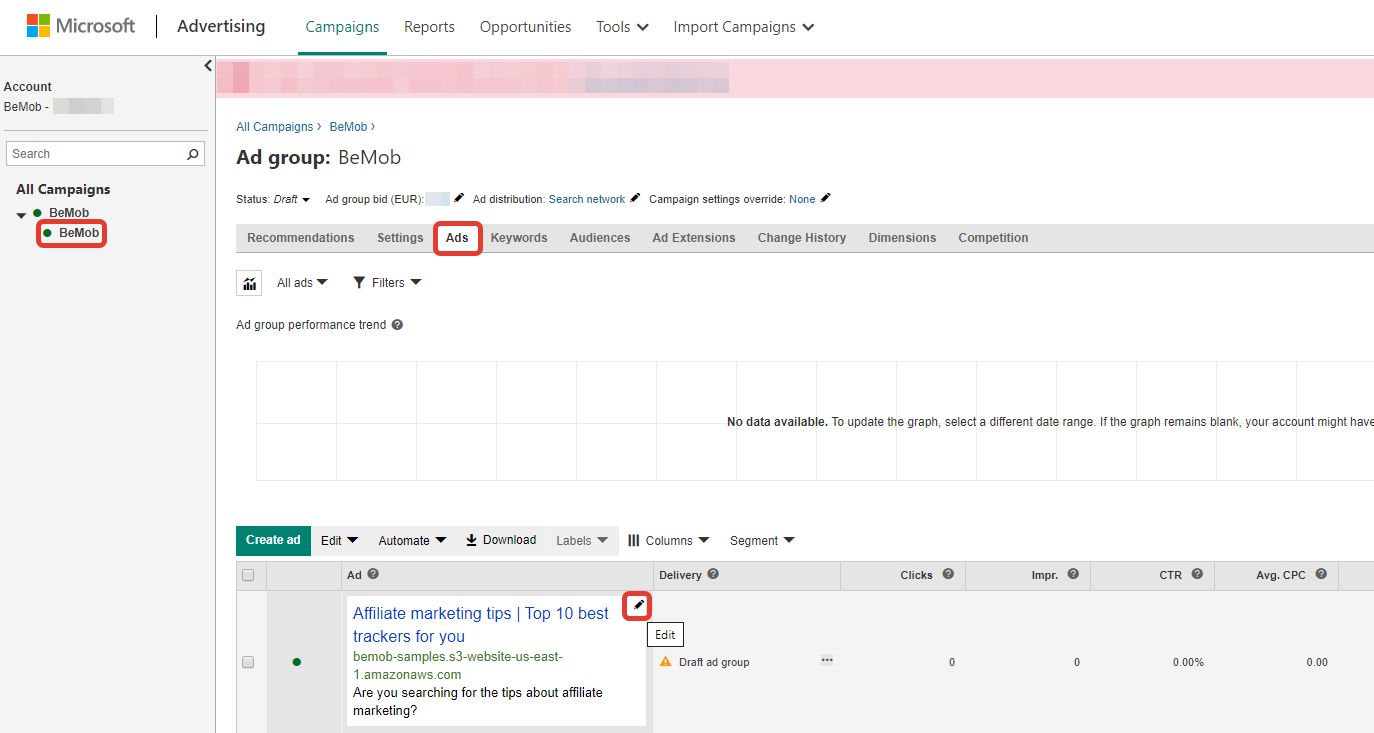
- Log in to your Bing Ads account.
- Click Campaigns tab.
- Choose a campaign you want to start.
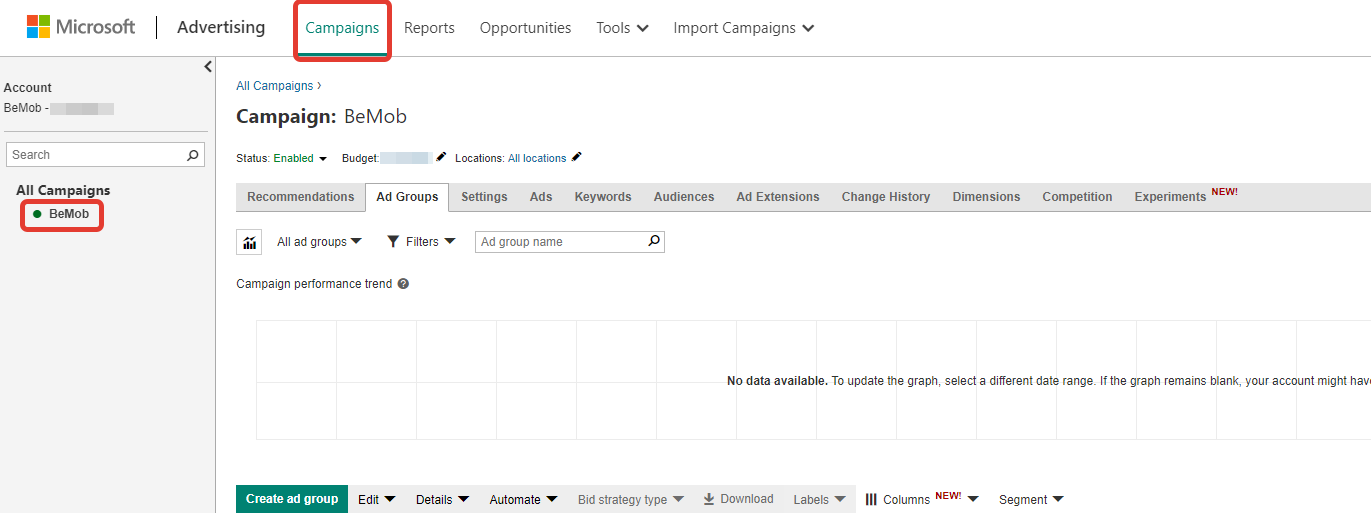
- Click on Ad Group of your campaign.
- Select Ads column and press pencil edit button.
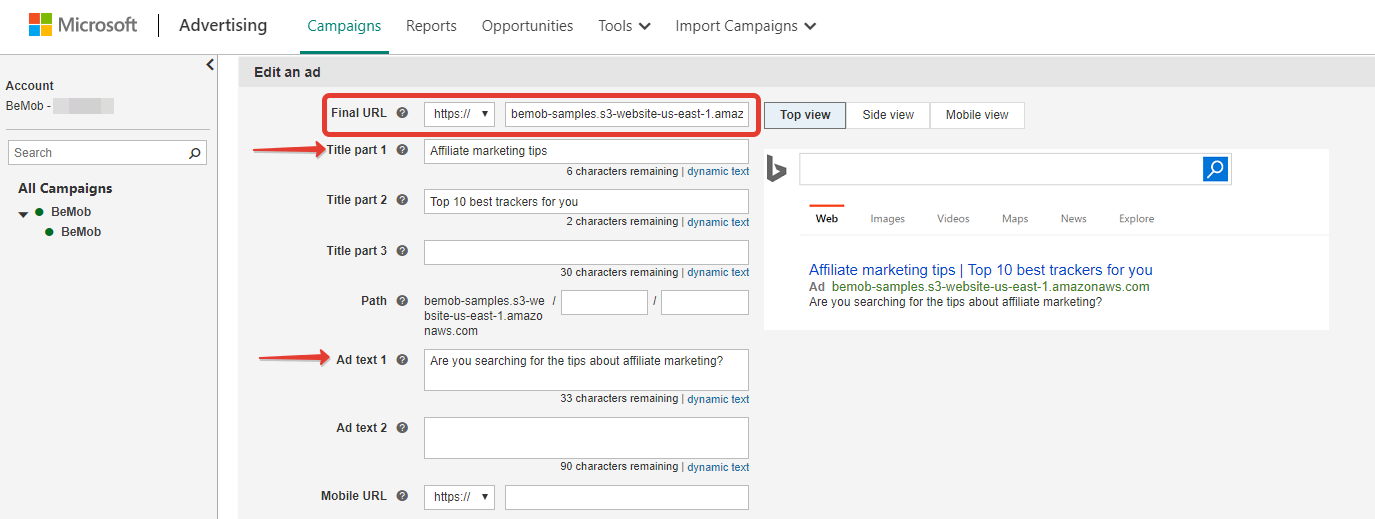
- Place your Landing URL to Final URL field.
For instance:
https://bemob-samples.s3-website-us-east-1.amazonaws.com
- Specify the required Ad Title and Ad Text.
Path and Mobile URL sections are optional, therefore you can skip it on this stage.
- Click Ad URL options button and add Bing tracking parameters to Final URL suffix field.
e. g. adgroup={AdGroupId}&adid={AdId}&bidtype={BidMatchType}&campaignid={CampaignId}&orderid={OrderItemId}&device={Device}&match={MatchType}&targetid={TargetId}&querystring={QueryString}
- After you complete all the corresponding fields click Save button.

- After your campaign is approved on the side of Bing Ads, you can start driving traffic to your campaign and track all the data with BeMob.
If the assistance is required, contact BeMob team:
Live Chat - the message window that appears in the right corner of the screen.
Email - [email protected]
Skype - live:anna_17683 or live:irenatomanov
Telegram - @bemob
Updated about 5 years ago
